
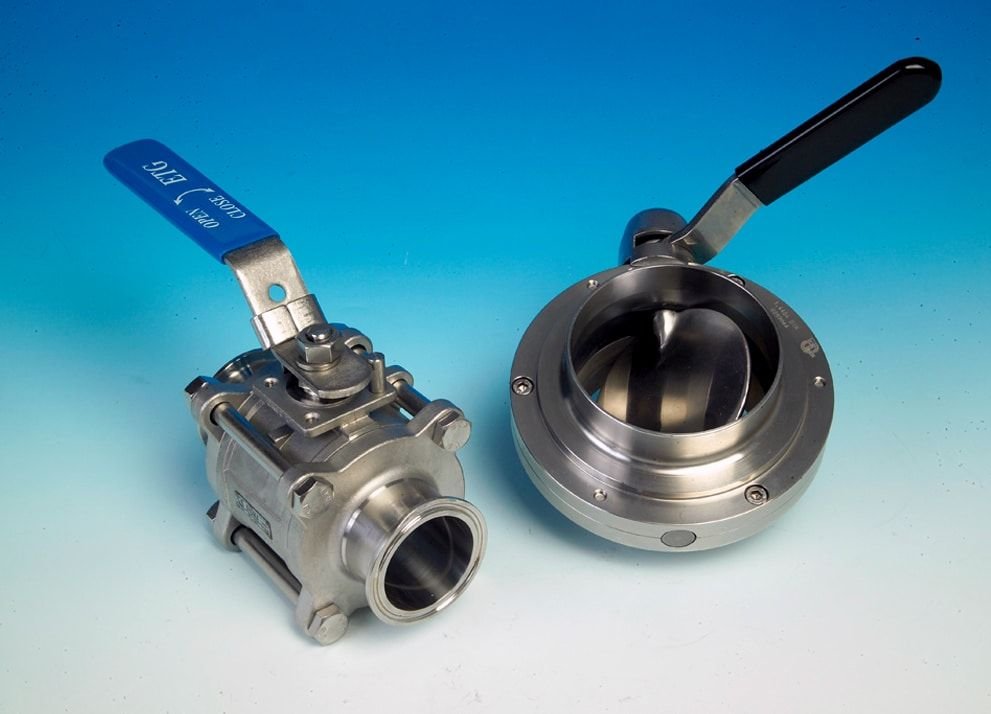
A butterfly valve seat is one of the most important components responsible for reliable shut-off. When the seat becomes worn, cracked, deformed, chemically damaged, or permanently compressed, the valve may begin to leak even though the body and disc remain in good condition.
In many applications, butterfly valve seat replacement can restore sealing performance without replacing the entire valve. However, the replacement process must be performed correctly. Choosing the wrong seat material, damaging the sealing surface during removal, or incorrectly installing the new seat can create the same leakage problem all over again.
This guide explains when a butterfly valve seat should be replaced, how to select a replacement seat, the general replacement procedure, common problems, testing requirements, and practical maintenance tips.
For industrial projects using flanged connections, you can also explore our flanged valve product range.
What Is a Butterfly Valve Seat?
The seat is the sealing component between the valve disc and body or seat-retaining area, depending on the butterfly valve design.
When the valve closes, the disc presses against the seat to restrict or stop flow.
Butterfly valve seats can be manufactured from different materials, including:
- EPDM
- NBR
- PTFE
- FKM
- Other elastomers
- Metal alloys for metal-seated designs
The correct material depends on the fluid, temperature, pressure, chemical compatibility, and valve construction.
A seat that works well in a water pipeline may not be suitable for oil, aggressive chemicals, high-temperature service, or abrasive media.
When Does a Butterfly Valve Seat Need Replacement?
A seat doesn’t necessarily need replacement simply because the valve has been in service for a certain number of years.
Instead, replacement should generally be based on condition and performance.
Common warning signs include:
Internal Leakage
The most obvious indication is leakage when the valve is supposed to be closed.
Possible causes include:
- Seat wear
- Seat damage
- Disc damage
- Foreign material
- Incorrect actuator adjustment
Before replacing the seat, determine whether the seat is actually the source of the problem.
Visible Cracks or Cuts
Inspect the seat for:
- Cracks
- Cuts
- Tears
- Permanent deformation
- Abrasion
- Swelling
These defects can create a direct leakage path.
Chemical Deterioration
An incompatible fluid can cause an elastomer to swell, harden, soften, or lose its mechanical properties.
Excessive Operating Torque
A deteriorated or incorrectly installed seat can increase friction between the disc and seat.
This may result in:
- Difficult manual operation
- High actuator torque
- Actuator trips
- Slow operation
Permanent Compression
Elastomeric seats can experience permanent deformation after long-term service, especially under unsuitable temperature or pressure conditions.
Butterfly Valve Seat Materials
Selecting the correct replacement material is just as important as the physical replacement procedure.
EPDM Seat
EPDM is widely used for water-related applications.
It is commonly selected for:
- Drinking water, where the specific grade is approved
- Cooling water
- HVAC
- General water treatment
EPDM generally isn’t the first choice for many petroleum-based oil applications.
NBR Seat
NBR is commonly selected where resistance to oils and hydrocarbons is important.
Applications may include:
- Industrial oil systems
- Certain fuel-related services
- Hydraulic applications
Actual suitability depends on the exact fluid and temperature.
PTFE Seat
PTFE provides excellent chemical resistance and is suitable for many aggressive chemical services.
However, temperature, pressure, creep, and valve design must be considered.
FKM Seat
FKM can be useful for selected chemical and hydrocarbon applications, especially where higher temperature resistance is required compared with some general-purpose elastomers.
The specific FKM grade and chemical exposure should always be checked.
Metal Seat
Metal-seated butterfly valves are used for certain severe-service applications.
They may be appropriate for:
- High-temperature service
- Certain abrasive applications
- Thermal cycling
- Specialized industrial processes
Metal seat replacement is generally more specialized than replacing a conventional resilient seat.
9 Steps for Butterfly Valve Seat Replacement
Step 1: Isolate the Valve
Safety comes first.
Before removing a valve or its internal components:
- Isolate the pipeline
- Shut off the relevant energy sources
- Depressurize the system
- Drain or vent the valve as required
- Confirm zero hazardous pressure
- Follow the facility’s lockout/tagout procedures
If the process medium is hazardous, appropriate decontamination procedures may also be required.
Never attempt seat replacement on a pressurized valve.
Step 2: Remove the Valve
The exact procedure depends on whether the valve is:
- Wafer type
- Lug type
- Flanged type
Support the valve properly before removing it, especially for large-diameter valves.
A large butterfly valve can be heavy, and the actuator can significantly increase the overall weight.
Use suitable lifting equipment and follow the manufacturer’s handling instructions.
Step 3: Inspect the Valve Before Removing the Seat
Before disassembly, inspect the complete valve.
Check:
- Body
- Disc
- Shaft
- Seat
- Bearings
- Actuator
- Gearbox
Look for corrosion, erosion, deformation, or mechanical damage.
This step is important because replacing the seat won’t solve a problem caused by a badly damaged disc or body.
Step 4: Remove the Old Seat
The seat-removal method depends heavily on the valve design.
Some resilient seated butterfly valves use replaceable liners or cartridges, while others have seats integrated into the valve body.
Follow the manufacturer’s disassembly instructions.
Avoid using sharp tools that could:
- Scratch the sealing surfaces
- Damage the valve body
- Cut the seat-retaining area
For large or specialized valves, a dedicated maintenance procedure may be required.
Step 5: Clean the Seat Area
Once the old seat has been removed, carefully clean the relevant surfaces.
Remove:
- Dirt
- Rubber residue
- Scale
- Corrosion products
- Process deposits
- Foreign material
The surface should be inspected before the new seat is installed.
If the body or disc is significantly damaged, replacing only the seat may not restore reliable sealing.
Step 6: Inspect the Disc and Shaft
This step shouldn’t be skipped.
The new seat needs a suitable mating surface.
Check the disc for:
- Corrosion
- Pitting
- Scratches
- Erosion
- Deformation
- Deposits
Also inspect the shaft and shaft-disc connection.
A damaged disc can quickly damage a new seat.
Step 7: Install the Replacement Seat
Install the new seat according to the valve manufacturer’s procedure.
Depending on the design, installation may involve:
- Positioning the liner
- Aligning seat features
- Installing retaining components
- Applying approved lubricant where specified
- Reassembling the valve body
Don’t use random grease or lubricants.
Some lubricants can attack elastomers or contaminate the process.
The replacement seat should match the original design dimensions and material requirements.
Step 8: Reassemble and Check Disc Movement
After the new seat is installed, reassemble the valve carefully.
Slowly operate the disc.
Check for:
- Binding
- Excessive friction
- Uneven resistance
- Disc interference
- Incorrect positioning
The valve should move through its intended operating range without abnormal resistance.
For automated valves, actuator settings may need to be checked after reassembly.
Step 9: Perform a Leakage and Functional Test
Before returning the valve to service, perform the applicable testing.
Depending on the application and project requirements, this may include:
- Shell pressure test
- Seat leakage test
- Functional operation test
- Actuator test
The test method should follow the applicable standard and manufacturer’s instructions.
Don’t assume that a newly installed seat automatically guarantees leak-free operation.
Butterfly Valve Seat Replacement Checklist
| Task | Completed |
|---|---|
| Pipeline isolated | ☐ |
| Pressure released | ☐ |
| Valve removed safely | ☐ |
| Old seat inspected | ☐ |
| Body inspected | ☐ |
| Disc inspected | ☐ |
| Shaft inspected | ☐ |
| Seat area cleaned | ☐ |
| Correct replacement seat selected | ☐ |
| New seat installed | ☐ |
| Disc movement checked | ☐ |
| Actuator checked | ☐ |
| Leakage test completed | ☐ |
| Functional test completed | ☐ |
| Maintenance record updated | ☐ |
How to Choose the Correct Replacement Butterfly Valve Seat
Don’t select a replacement seat based only on valve diameter.
You should confirm:
Valve Size
For example:
- DN50
- DN100
- DN200
- DN300
Valve Design
Identify whether the valve is:
- Concentric
- Double offset
- Triple offset
- Wafer
- Lug
- Flanged
Seat Material
Confirm:
- EPDM
- NBR
- PTFE
- FKM
- Metal
- Other specified material
Pressure Rating
Check the valve’s actual pressure rating and operating differential pressure.
Temperature
Seat materials have different temperature limits.
Fluid Compatibility
Consider the actual process medium rather than simply classifying the service as “industrial.”
For chemical applications, check compatibility against the exact chemical concentration and operating temperature.
Why Does a New Butterfly Valve Seat Leak?
Replacing the seat doesn’t always solve leakage.
If the new seat leaks immediately, investigate:
Incorrect Seat Installation
The seat may be misaligned, twisted, or improperly positioned.
Damaged Disc
A damaged sealing surface can prevent proper contact.
Foreign Material
Small particles can become trapped between the disc and seat.
Incorrect Seat Material
Chemical or temperature incompatibility can cause premature deterioration.
Incorrect Actuator Adjustment
The actuator may not move the disc into the correct closed position.
Excessive Differential Pressure
The valve may be operating outside its specified shut-off conditions.
Valve Body Damage
Corrosion or deformation can prevent proper seating.
Butterfly Valve Seat Replacement vs Complete Valve Replacement
Seat replacement can be an economical repair when the main valve components remain in good condition.
Seat Replacement May Make Sense When:
- Body is structurally sound
- Disc is in good condition
- Shaft is acceptable
- Replacement parts are available
- Leakage is primarily seat-related
- Repair cost is reasonable
Complete Replacement May Be Better When:
- Body is severely corroded
- Disc is badly damaged
- Shaft is severely worn
- Spare parts are unavailable
- Valve design is obsolete
- Repair costs approach the cost of a new valve
- The existing valve isn’t suitable for the current service
A condition assessment should guide the decision.
Butterfly Valve Seat Replacement for Water Applications
Water applications often use resilient seats because they provide effective shut-off at relatively moderate temperatures.
EPDM is widely used in water systems, but the exact material grade and regulatory approvals should be verified when the valve is intended for potable water.
For wastewater applications, inspect the seat more frequently if solids, suspended particles, or abrasive material are present.
Foreign material can become trapped between the disc and seat and accelerate wear.
Butterfly Valve Seat Replacement for Chemical Applications
Chemical service requires careful material selection.
Before installing a replacement seat, verify:
- Chemical concentration
- Operating temperature
- Pressure
- Exposure time
- Chemical compatibility
- Cleaning chemicals
- Sterilization conditions, if applicable
A material that performs well with one chemical may perform poorly with another.
Never choose a seat solely because it is commonly used in industrial valves.
Butterfly Valve Seat Replacement for High-Temperature Service
High temperature can significantly affect elastomeric seats.
Potential problems include:
- Hardening
- Softening
- Compression set
- Loss of elasticity
- Chemical degradation
For demanding high-temperature service, the valve may require a different design rather than simply a different soft-seat material.
Metal-seated butterfly valves, especially offset designs, can be considered for certain high-temperature applications.
How Often Should a Butterfly Valve Seat Be Replaced?
There is no universal replacement interval.
Seat life depends on:
- Temperature
- Pressure
- Fluid
- Chemical exposure
- Abrasive particles
- Number of operating cycles
- Installation quality
- Storage conditions
- Seat material
A better approach is condition-based maintenance.
Replace the seat when inspection and performance data show that it no longer meets the required sealing or operating requirements.
Frequently Asked Questions
Can I replace a butterfly valve seat myself?
It depends on the valve design, size, and application. Small, simple valves may have straightforward replaceable seats, while large industrial or specialized valves can require dedicated tools and procedures. Always follow the manufacturer’s instructions.
How do I know if my butterfly valve seat needs replacement?
Common signs include persistent internal leakage, visible cracks, deformation, hardening, chemical deterioration, excessive wear, or increased operating torque.
Can a new seat fix a leaking butterfly valve?
It can if the seat is the primary cause of leakage. However, disc damage, body damage, foreign material, actuator problems, or excessive differential pressure can also cause leakage.
Which butterfly valve seat material is best?
There isn’t one universally best material. EPDM is common for water, NBR is useful for many oil-related services, PTFE provides broad chemical resistance, and metal seats are used for selected severe-service applications.
How long does a butterfly valve seat last?
Service life varies greatly. Temperature, fluid compatibility, pressure, operating cycles, abrasion, and installation quality can all affect seat life.
Do I need to replace the disc when replacing the seat?
Not necessarily. If the disc is in good condition and its sealing surface meets the manufacturer’s requirements, the seat alone may be replaceable.
Why does my butterfly valve still leak after seat replacement?
Possible causes include incorrect seat installation, disc damage, debris, actuator adjustment, excessive differential pressure, or incorrect seat material.
Can EPDM seats be used for oil?
EPDM is generally not the preferred material for many petroleum-based oil applications. The exact fluid, concentration, temperature, and manufacturer compatibility data should be checked before selection.
Is butterfly valve seat replacement cheaper than replacing the whole valve?
Often it can be, especially when the body, disc, and shaft remain in good condition. However, labor, downtime, spare-part availability, and valve size should be included in the total repair-cost assessment.
Conclusion
Butterfly valve seat replacement can be an effective way to restore sealing performance and extend the service life of an otherwise healthy valve. The key is to identify the real cause of leakage before beginning the repair.
A successful replacement requires more than installing a new rubber or polymer seat. The technician should inspect the valve body, disc, shaft, sealing surfaces, actuator, and operating conditions, then select a replacement seat that matches the valve design and process medium.
For water service, EPDM is often a practical choice. NBR, PTFE, FKM, and metal seating may be more appropriate for other applications. The final selection should always be based on actual operating conditions and manufacturer compatibility data.
When the valve body or disc is severely damaged, complete valve replacement may be more reliable than replacing the seat alone. But when the main components remain in good condition, a properly performed seat replacement can provide a cost-effective path to restoring dependable shut-off performance.